Every new Windows operating system is welcomed with a mixture of enthusiasm because of the brand new components that have been integrated and a nervousness for the changes that are involved. This is because each new Windows operating system brings with it a number of significant improvements.
Yet if there’s one thing on which all Windows users can agree, it’s that they want the smoothest and quickest experience that’s available to them. Whether you are new to Windows or a seasoned pro still learning the ropes, you’ll find the following collection of helpful hints and suggestions for maximising your experience with Windows invaluable.
Some of them will help you work more quickly with the operating system, while others will allow you to leave your stamp on Windows 11 and make it uniquely yours.. Nonetheless, they may all be summed up by the fact that Windows is enhanced in one way or another.
Switch the On/Off Button
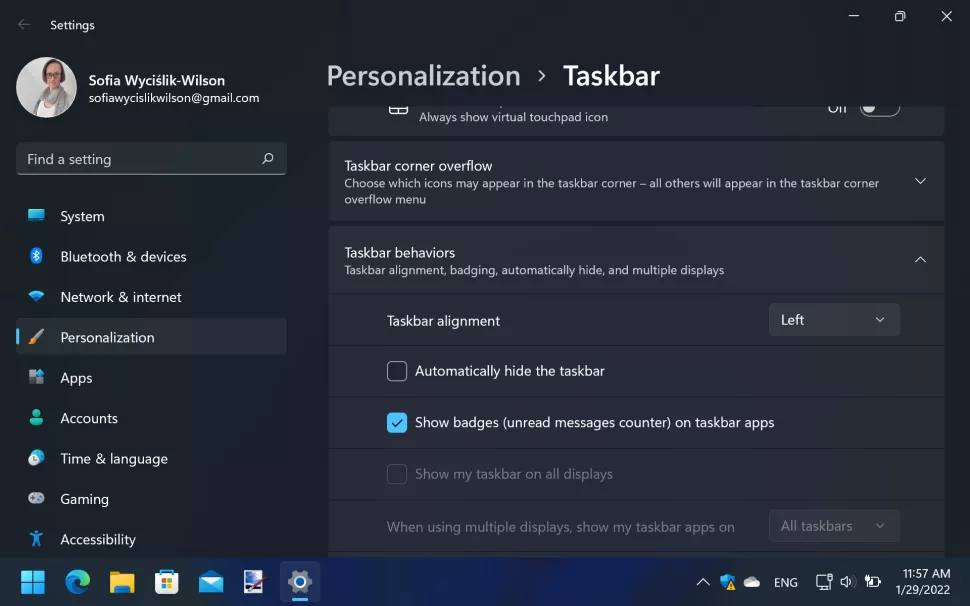
You will note that the Start button as well as the taskbar’s icons are arranged in a centred fashion. This is a design choice that is not universally well received by users. You may change the location of the Start button on the taskbar by right-clicking an empty area of the bar and selecting “Taskbar settings” from the context menu that appears.
This is the default location for the button. Simply expand the Taskbar behaviours section by clicking on the arrow to the right of the section’s name, and then use the Taskbar’s drop-down option to select Left for the alignment.
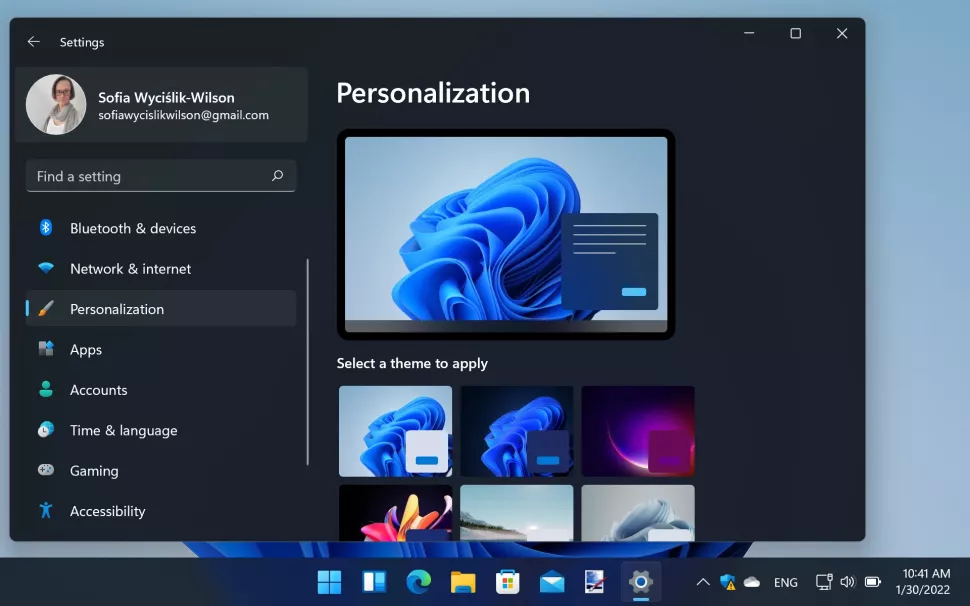
Activate Dark Mode

Windows 11 is following the trend that many other apps have begun implementing, which is to provide users with the option to convert to a darker tint.
If you would rather have darker themes, right-click a vacant region of the desktop, select Customize, and then click the Color portion of the menu that appears. Select Dark from the corresponding pull-down option, which is labelled Pick your mode.
Utilize Snap layouts

When you have a number of apps open and running as well as many instances of Explorer running in the background, it can be challenging to arrange the windows on the display in a way that makes navigating simple. It’s possible that the Snap feature in Windows 11 is the answer you’ve been waiting for.
When you hover your mouse over the Maximize/Resize option, you’ll get a list of available layouts that you may use to rapidly organise active windows. There is a selection available, each of which is optimised for a unique set of responsibilities and screen dimensions.
Hide Extra Buttons on the Taskbar
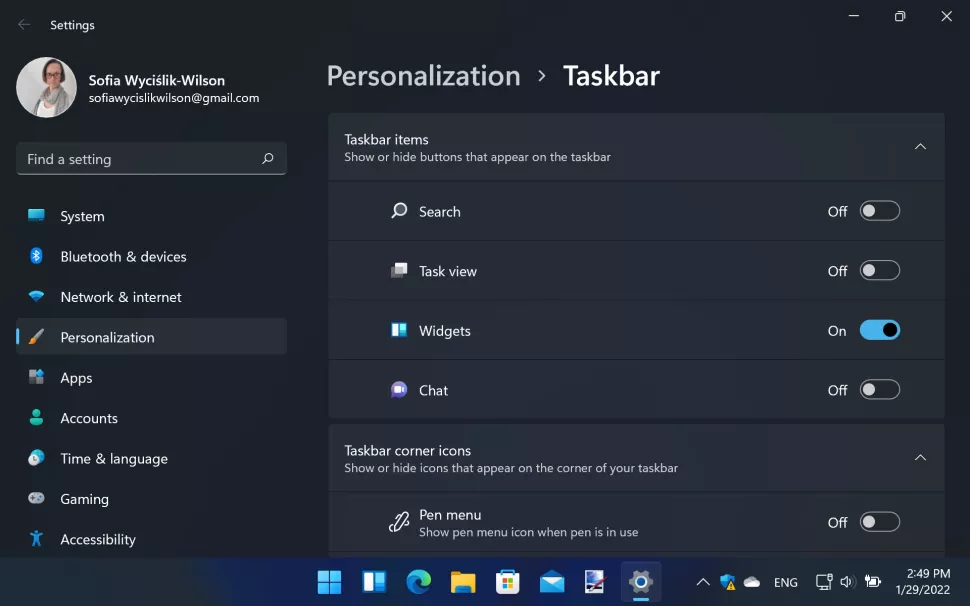
You’ll find buttons for Widgets and Task view right next to the Start menu’s primary button. You are able to conceal these if you do not require these by right-clicking a vacant region of the taskbar and choosing the Taskbar settings option from the context menu that appears.
After that, you will have the option to switch between the Widgets and the Task view. The Search and Talk buttons offer the same degree of customization.
Enable Focus Assist To Get Rid of Distractions

When you need to get more work done and spend less time distracted by other things, you can utilise Focus Assist to stop notifications from displaying on your screen. Launch the Settings app, then navigate to the System section, and finally select Focus assist.
If you have only Alarms selected, then the only alerts that will get your attention are the alarms. You have the ability to select other alerts that should also be allowed by using the Focus only option, and you can also select times when the focus assistant function ought to be turned on by default.
Exclude Edge in Alt + Tab
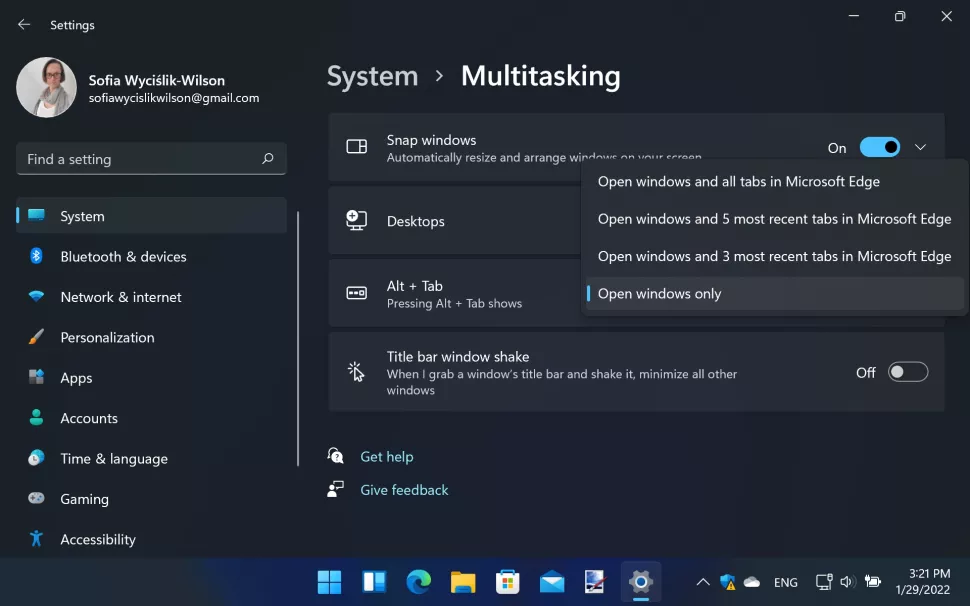
You undoubtedly know how to switch between windows and open applications by utilising the shortcut on your keyboard that consists of Alt and Tab. In Windows 11, you now have the ability to include Edge browser tabs in the Alt + Tab list, which makes navigation much simpler.
In the Settings app, navigate to System > Multi-tasking, and then in the section titled Alt + Tab, use the drop-down menu to select Open windows only. This will cause Edge tabs to be ignored.
Make Good Use of Various Widgets
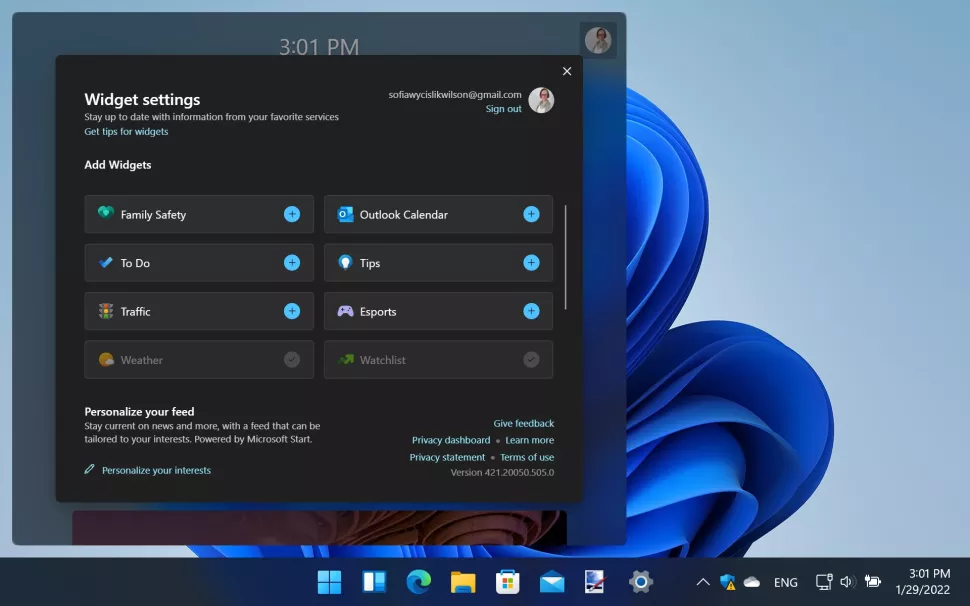
When you select the Widgets button from the taskbar – the blue-and-white button that is located next to the Start button – a little pop-up window will appear that will display mini-apps.
These mini-apps are known as widgets. You have the ability to personalise the widgets that appear on the screen by pressing the icon that is located to the upper right, accompanied by your profile image. To include a widget in the display, choose it and then select the plus sign (+) button that appears next to its preview.
Once you have returned to the basic widget panel, you may get rid of undesirable widgets by pressing the x that is situated in the top right-hand corner of each widget.
Shortcuts on the Start Menu
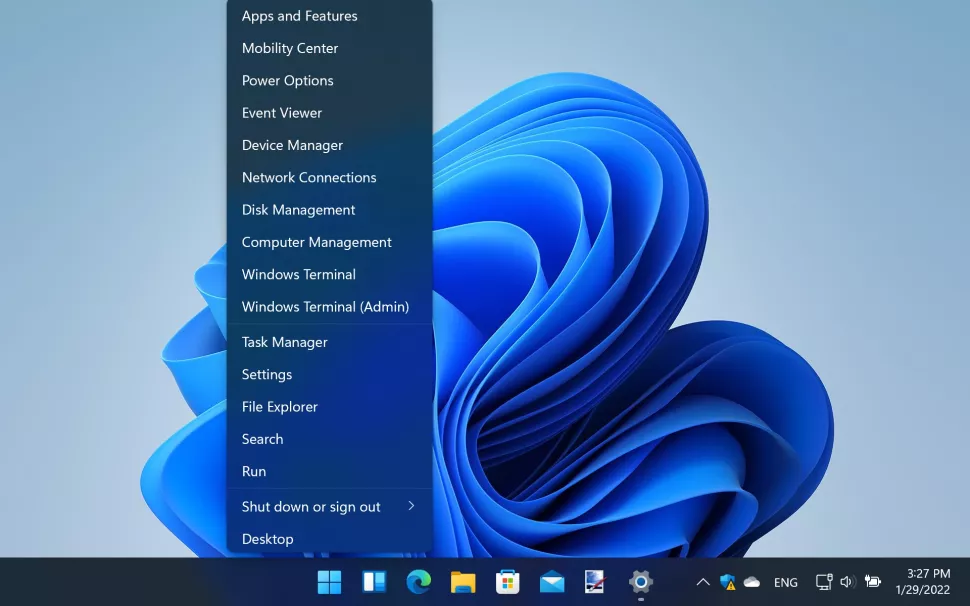
A convenient menu that allows quick access to a variety of Windows 11 features can be displayed by right-clicking the Start button, or by pressing the Windows key in combination with the X key.
This provides access to the Internet Explorer settings as well as other elements of the Control Panel.
Amplify Your PC Sound

Windows 11 has the ability to improve the sound quality of your music, regardless of whether you hear with headphones or speakers. Obviously right the volume icon located in the taskbar and choose Sound settings from the context menu.
You can enhance the sound by turning on the toggle that is labelled Enhance audio by selecting the option from the drop-down menu that appears when you click the arrow that is located towards the right of the audio interface that you are currently using.
Pin Apps that are Used Frequently
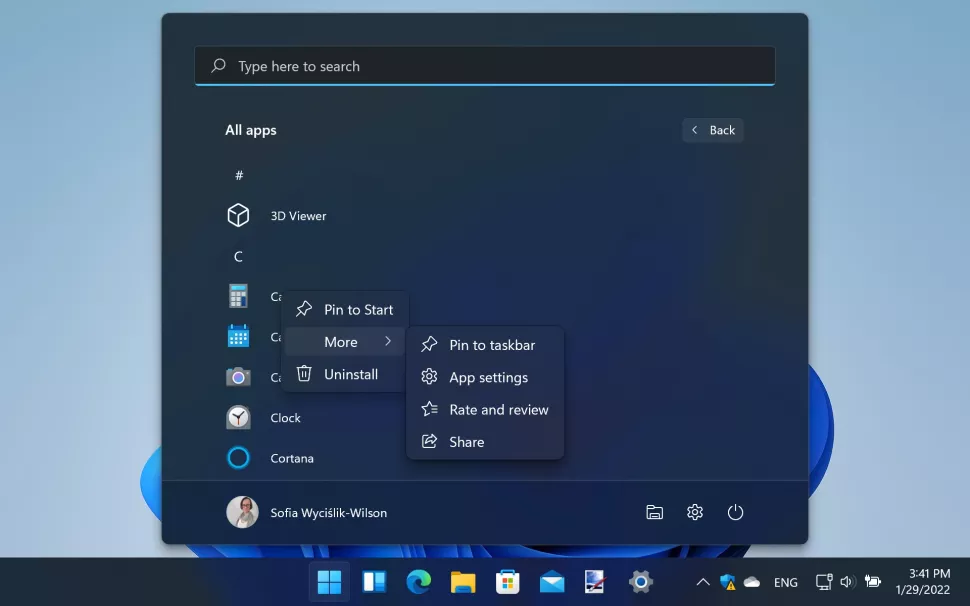
You may make quick access to the applications you use the most by pinning them to a taskbar or to the very top of the Menu bar. Hit the Start button, then right-click the icon for an application that you use frequently to customise it.
Choose the option that best suits your needs from the drop-down menu that opens, giving you the choice between “Pin to Start” and “Pin to taskbar.”
Customise Windows 11 Start Menu
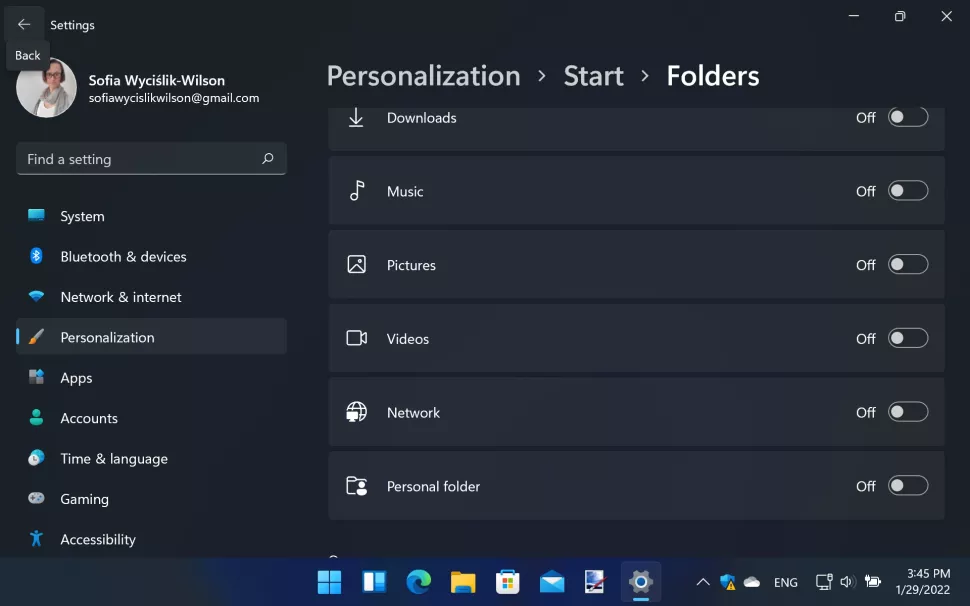
The Start menu has a large amount of content that you may choose to display or conceal. To activate or disable most-used apps , recently installed apps, and recent things, open Settings, navigate to the Personalization section, and then select Start from the menu that appears.
Toggle switches allow you to create shortcuts to a number of different options, such as Settings, Explorer, or particular folders, which are accessible after clicking the Folders tab.
Expand Right Click Menu

Because the context menu in Windows 11 (that which appears when you select “Right-Click” in Explorer) has been altered, you may discover that some options that you are accustomed to using are not present.
You can get the menu in its previous format by choosing a folder or file and then pressing the Shift key in conjunction with the F10 key, which is located in the utmost right-hand corner of the drop-down menu
Clear the Decks

You may minimise all open windows by pressing the Windows key plus D on your keyboard, yet there’s another option available to you. In the Settings app, navigate to System > Multitasking, and reposition the toggle in the title bar to the On position to enable window shaking.
Now, if you click and hold the left button of the mouse on the window’s title bar in a running programme, then shake the mouse from side to side, all other windows will be minimised except for the one you picked to work with.
Convenient Shortcut for the Settings
On Windows 11, there are a lot of helpful keyboard shortcuts to master, but the Windows key plus the letter I is one of the most essential ones for anyone who alters their settings on a regular basis. If you press the aforementioned key combination, the Settings app will open.
Windows 11 Custom Screenshots
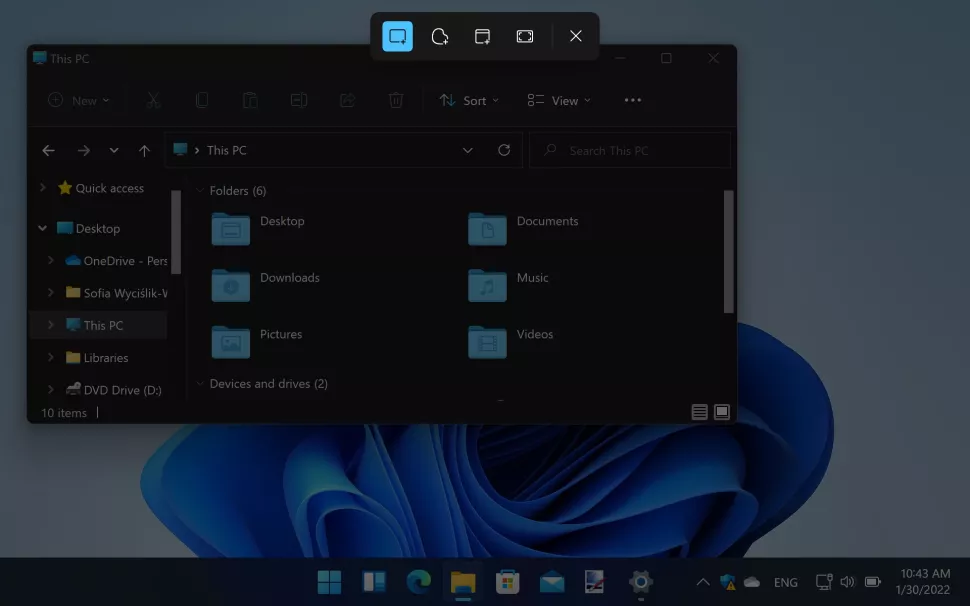
You probably already know that you can capture what you are seeing on the screen in front of you by clicking the Print Screen button, and then bringing the contents of the clipboard into the image editor of your choice. But if you press Windows + Shift + S, you will enter the Snipping Tool software; It allows you to capture a screenshot of a specific region of your desktop or of any window that is currently active.
Launch Pinned Apps Quickly

If you have shortcuts saved to the taskbar, you currently have a quick and simple method to start the applications you use the most often. However, you can also open the app for whom icon is currently located in the top position by pressing Windows plus 1, followed by Windows plus 2 to open the app currently located in the 2nd position, and so on.
If you want to open the programmes whose shortcuts are located 3rd and 4th in the taskbar, for example, you can accomplish so by pressing Windows + 3 + 4.
Voice Typing Allows To Type Quickly
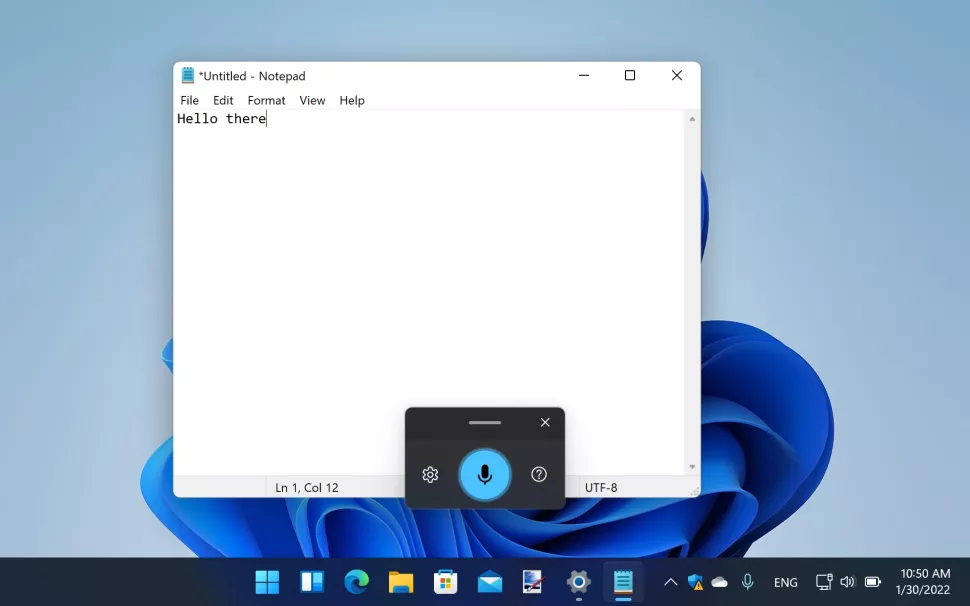
If you want to enter text into your computer a little bit faster, rather than using the keyboard, you may suggest speaking to your computer instead. You can activate Voice typing by pressing the Windows key and the letter H, and then you may use it to dictation text instead of writing it out by hands.
Examine the Battery Usage
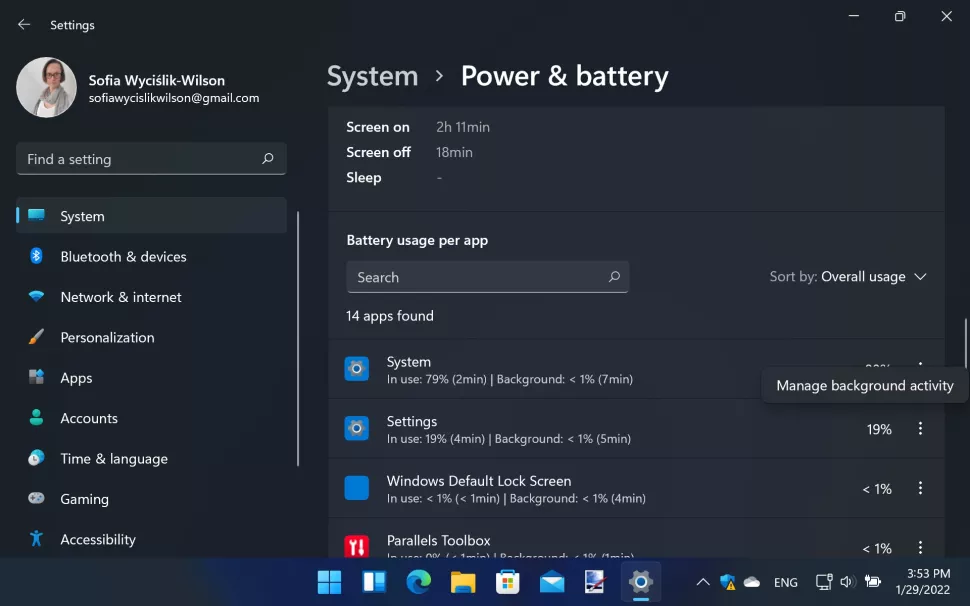
It is likely that you will want to get the most life out of your battery if you are working on a laptop. By accessing Settings and navigating to System > Power & battery When you are not in close proximity to a power source, you will be able to determine which applications are using the most battery life.
When you click See comprehensive information next to the helpful graph of battery time, you will be presented with a list of applications that consume a lot of battery life.
Using the menu with the three dots that is located next to the application’s entry in the list, you are able to terminate any processes that are not required or manage the tasks that they perform in the background.
Utilize Virtual Desktops

It is very simple to run out of room on your computer’s desktop, or to become disoriented in a sea of windows. Virtual desktops can be of assistance in both of these scenarios. Create a new digital workspace by selecting the Task View button, which is located close to the Start button. After that, select the new desktop option.
You can use this, as well as any additional desktops you create, in exactly the same way as your regular desktop. To switch between them, hit the right or left arrow key while holding the Windows key and the control key simultaneously.
Modify the Quick Settings

You may access Quick Settings by clicking the Network/Volume/Power button in the taskbar. This will bring up a menu that provides rapid access to important choices and settings.
You can remove items from your list that you no longer require or add new ones that are absent by selecting the pencil button, then selecting the ‘unpin’ button that is located next to the item that you do not want, and then choosing the Add button to select other items.